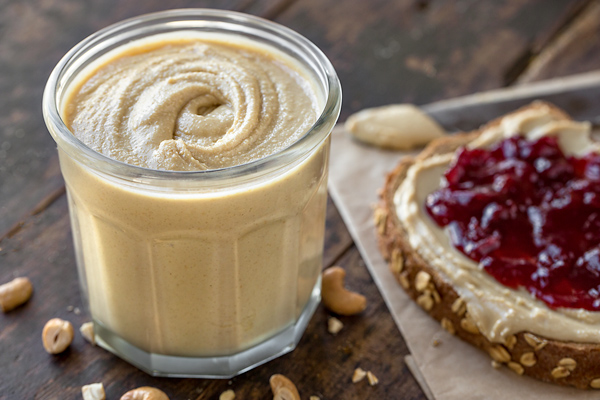
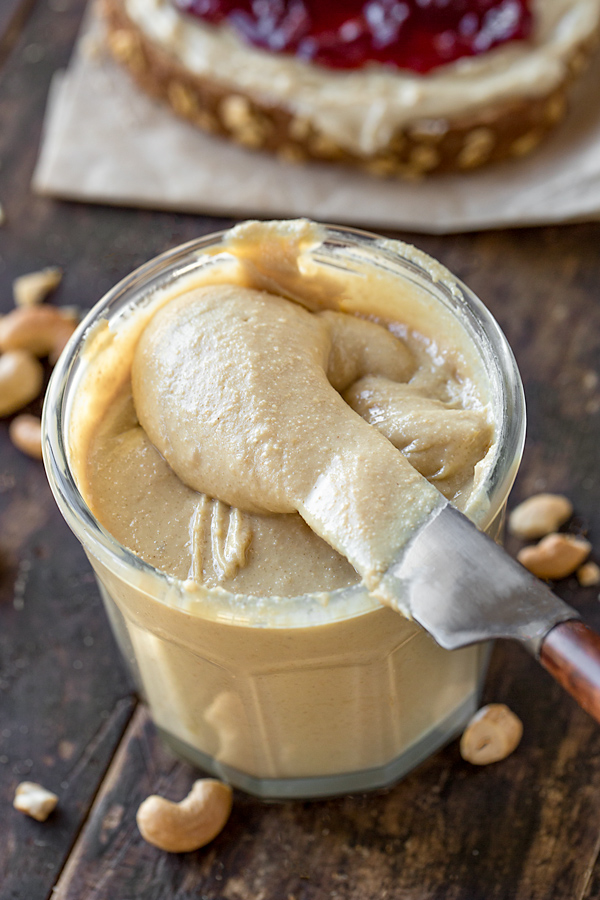
This creamy cashew butter is a delicious and healthy alternative to peanut butter when you're craving a nut butter spread for your toast or PB&J sandwich. Prepared with freshly roasted cashews and a touch of brown sugar for mild sweetness, this cashew butter recipe has a deeply nutty flavor and is a great source of extra protein and healthy fat!
Healthy, homemade nut butter
Many times when I'm craving something crunchy as a snack in the evenings, I'll pour myself a little ramekin of mixed nuts such as almonds, pistachios, and roasted cashews to munch on.
Or maybe I'll scoop up a heaping spoonful of peanut butter and enjoy that with a bit of good dark chocolate for dipping. I might even munch on one of my no-bake energy bites made with a touch of almond butter.
I love the flavor of nuts and nut butters, and because of that, I figured it would be fun to get into my kitchen to whip up my own cashew butter recipe, flavoring it to my liking.
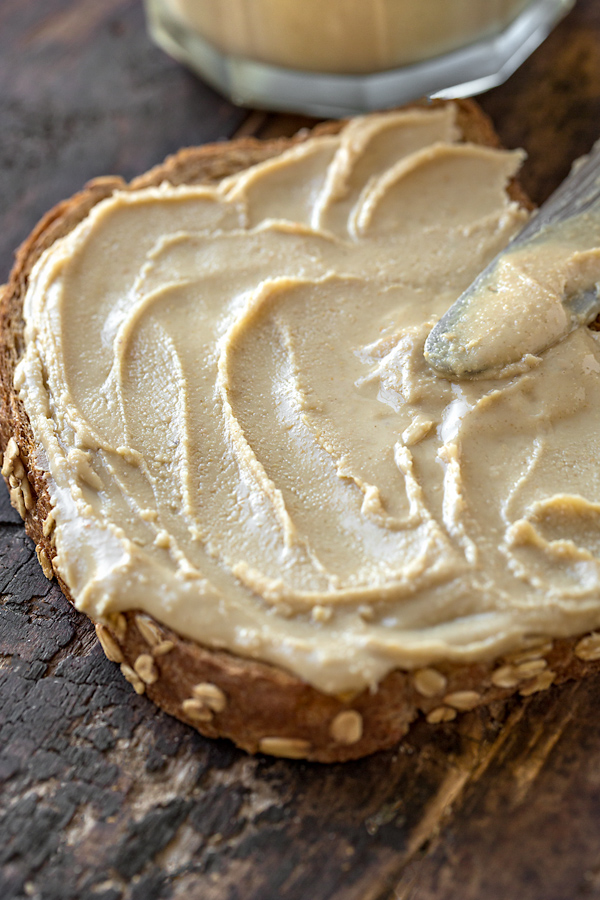
Cashew butter is one of those healthy homemade treats that's great by the spoonful, spread on toast (with some cherry preserves, please!), or mixed into a smoothie for extra protein and texture.
And since cashews are an amazing source of healthy fat, as well as vitamins E, K, and B6, copper, zinc, magnesium, iron, phosphorus, and selenium, they're the perfect nut for a homemade nut butter!
Cashew butter is also a fantastic (and delicious!) substitute for peanut butter when it comes to sandwiches. You can make cashew butter & jelly sandwiches for yourself or your kids as a twist on a traditional "PB&J"!
My recipe for cashew butter
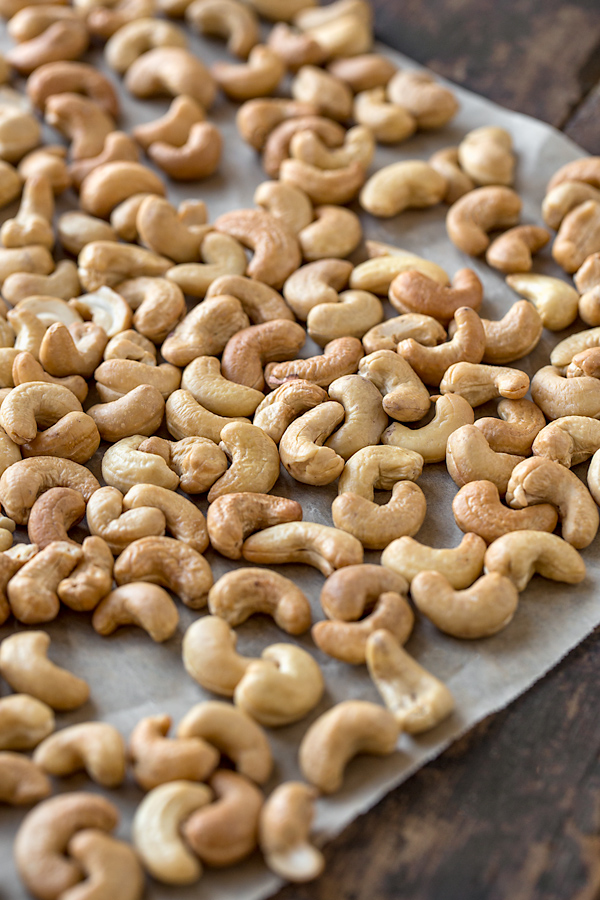
Because I like to control the flavor (and salt level) of my homemade cashew butter recipe, I like to use raw, unsalted cashews. I actually roast them myself, then add in a touch of salt and a sweetener during the blending process.
Since I personally prefer my cashew butter plain, I don't add in any spices. However, a small sprinkle of cinnamon (or perhaps another spice) during the blending process can give it a different flavor profile, which can be nice too!
When it comes to adding in a sweetener, I found it best to use a granulated sugar (I used brown sugar) as opposed to a liquid like maple or honey. The liquid tends to seize up the nut butter and make it grainy. That said, you can use a liquid, if you prefer. Just keep in mind you will need to blend the cashew butter for a while longer to create a creamy consistency.
Also, adding in the small amount of coconut (or other) oil helps the cashews to blend up nice and creamy and smooth. It helps them to stay moist during processing so they can break down more easily.
Here's a glance at my cashew butter recipe:
(or just jump to the full recipe...)
- To get started, I roast my raw cashews for about 12 minutes, then allow them to cool.
- Next, I add my roasted and cooled cashews to the bowl of my food processor along with some salt and coconut oil.
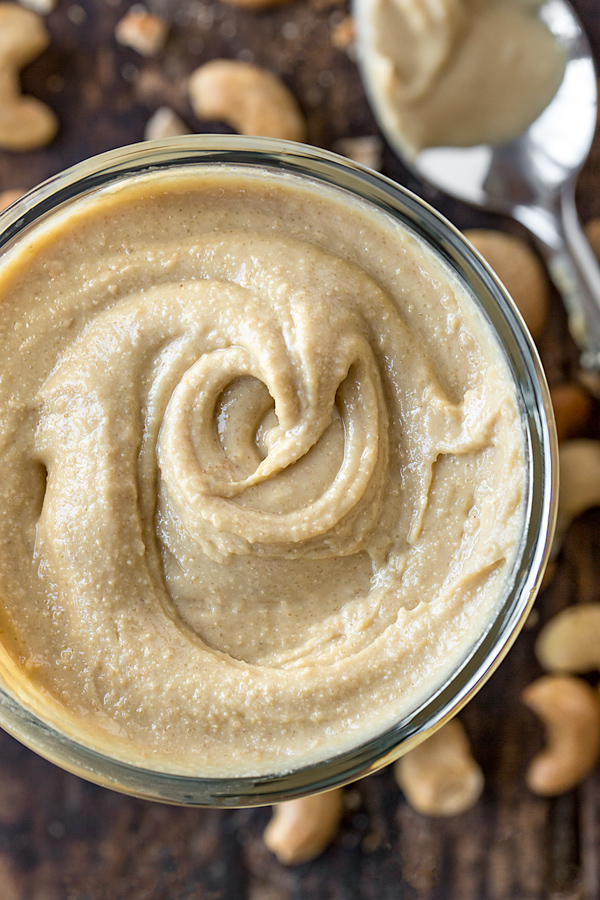
- I then process the nut butter for a few minutes until the cashews crumble and begin to break down. It will go from a crumbly mixture to a smooth, creamy consistency over time.
- Finally, I add in a touch of brown sugar for sweetness, processing it in until well blended.
- I spoon the cashew butter into a covered container and keep it in the fridge. When ready to use it, I allow it to soften at room temp for a bit.
Recipe
Cashew Butter Recipe
by Ingrid Beer

This creamy cashew butter recipe has a wonderfully roasted, nutty flavor and a hint of sweetness, perfect on toast or in smoothies!
Category: Condiment
Cuisine: American
Yield: 1 ¾ cups
Nutrition Info: 192 calories (per 2 tablespoons)
Prep Time: 35 minutes (includes time for processing the butter)
Cook time: 12 minutes (for roasting cashews)
Total time: 47 minutes
Ingredients:
- 16 ounces (3 cups) raw, unsalted cashews (organic, ideally)
- 1 tablespoon coconut oil, melted (or avocado oil for more neutral flavor)
- ½ teaspoon (heaping) salt
- 1 tablespoon plus 2 teaspoons brown sugar
- Begin by gathering and prepping all of your ingredients according to the ingredient list above to have ready and organized for use.
- Preheat the oven to 350°, and line a baking sheet with parchment paper or foil.
- Place the cashews in a single layer onto the baking sheet, and roast for about 12 minutes, stirring occasionally for even roasting. Remove from oven and allow the cashews to cool almost completely, for about 10 to 15 minutes.
- Next, add the cooled cashews to the bowl of a food processor, along with the salt and the coconut oil, and process until the nuts become a fine crumble. (You may need to scrape down the sides periodically.)
- Then, continue to process the mixture for a few minutes at a time, as it goes from crumble to mass, to a ball-like state, to finally creamy (be patient—it will eventually happen!). Take a few minutes here and there to turn off your food processor and scrape it down, and give it a break to cool down so that it doesn't overheat.
- Once the mixture becomes a creamy nut butter (somewhere between 10 to 20 minutes with the breaks in between), turn off the processor, add the brown sugar, and process that just until combined.
- Spoon the cashew butter into a pint-size container with a lid, and store in the fridge for up to two to three weeks. When ready to enjoy, remove from the fridge and allow it to come to room temp for a few minutes to bring it back to a creamier consistency for easier spreading, or microwave your desired amount for about 20 to 30 seconds for easy spreadability.
Tips & tidbits for my cashew butter recipe:
- Raw, unsalted cashews: I like to control how much salt goes into the cashew butter, and I also like to roast the cashews myself for a more freshly roasted flavor. So, I recommend raw, unsalted cashews for this recipe. And if possible, opt for organic cashews.
- A touch of salt for depth: If you are watching your salt, you may certainly leave it out of the recipe, but adding a small amount of salt will bring a lot more flavor to this cashew butter, as it will be quite bland if left out.
- Add spices for more flavor: Feel free to add in a sprinkle of cinnamon or pumpkin pie spice, perhaps even turmeric or a more savory spice. Add any additional flavorings when the salt is added.
- Using sweeteners: I've noticed that granulated sweeteners work best for homemade nut butters. I like to use brown sugar in mine for a warmer, more caramel-like note, but you can use regular granulated or even maple sugar. Honey and maple syrup can also be used, but because they are liquid, they really tend to seize up the nut butters. I have found that the brown sugar beautifully and effortlessly blends into the cashew butter without ruining its creamy consistency. (As I mentioned earlier, feel free to use honey or maple syrup, if you'd like. Just be prepared to continue to process it longer after it is added. The cashew butter will seize up and you will have to re-blend it until creamy.)
- Give your processor a break when processing your cashew butter: Since the processing of a homemade cashew (or other nut) butter can take 10 to 20 minutes, I like to periodically turn my food processor off. That will allow it to rest and give me the chance to scrape down the sides. The cashews will eventually release their oils and the mixture will become a creamy texture. It is normal for the cashews to go through various stages of breaking down, and it may seem like it's taking an excessively long time. Just keep processing, turning off the processor every few minutes as needed, until you see the nut butter get to the consistency you want.
- Creamy and a bit "loose" at first: When freshly blended, you may notice that the cashew butter is a touch on the loose side, but this is because it gets quite warm while processing. That warmth may bring the oils to the surface, but once the cashew butter cools a bit, it will slightly thicken.
- Store in the fridge: Because this cashew butter has no stabilizers or preservatives, it is recommended that it be stored in the refrigerator in a covered container. It should keep well for about two to three weeks. It can be made nice and creamy again by allowing it to come to room temp for a few minutes before spreading. (You can also microwave it for 20 to 30 seconds.)
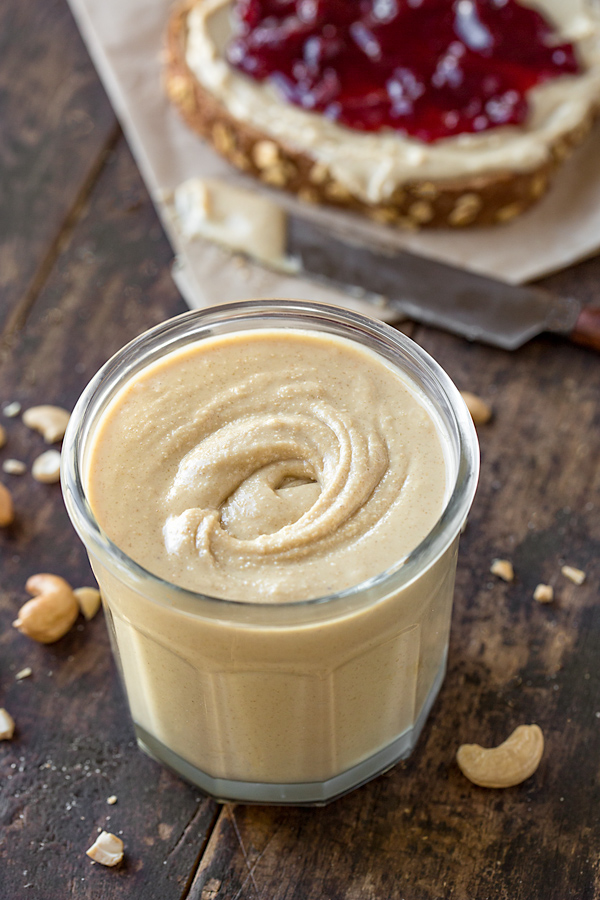
Craving more sweet and spreadable options for your toast? Check out my recipe for Cherry Jam, or perhaps my recipe Apricot Jam!
Cook's Note: This recipe was originally published in 2019, and has been updated with even more love!


Erika
Thank you so much for taking the time to explain the consistency difference between granulated sweeteners and maple syrup or honey. I'm off of granulated sweeteners for now and I couldn't figure out why my cashew butter was so crumbly when adding maple syrup or honey. In retrospect, it seems obvious that I needed to process longer but I hadn't gotten there yet. I now have wonderfully creamy sweetened cashew butter!
The Cozy Apron
Erika, I was so thrilled to read that!
Thanks so much for sharing that with me, because I'm really glad to know my tips were useful and effective.
I, too, have previously used honey, and found that if I kept processing, it would eventually become smooth once again. Does take a while, but it happens.
But I found that the brown sugar in this particular recipe eliminates the need for that, and for those that don't mind granulated sweeteners, it's a bit easier.
Glad you found success!