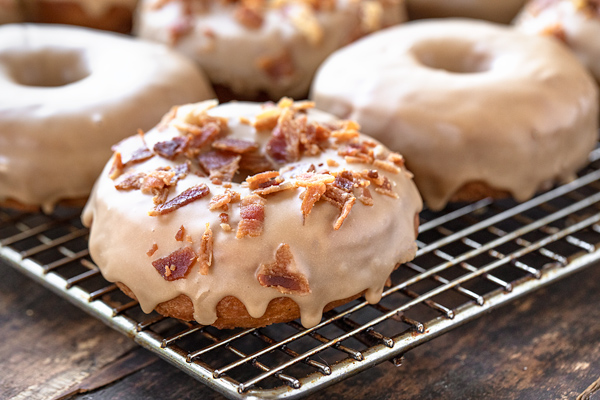
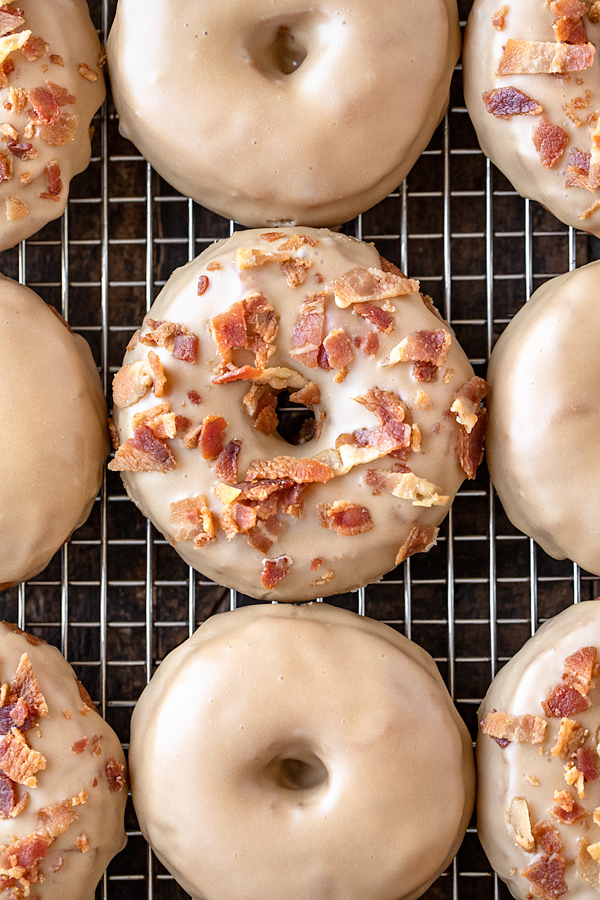
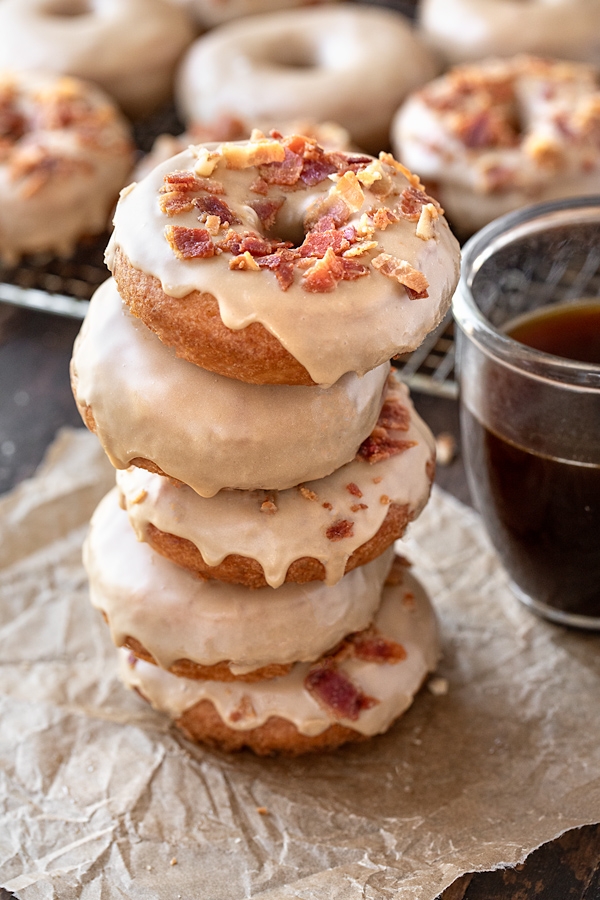
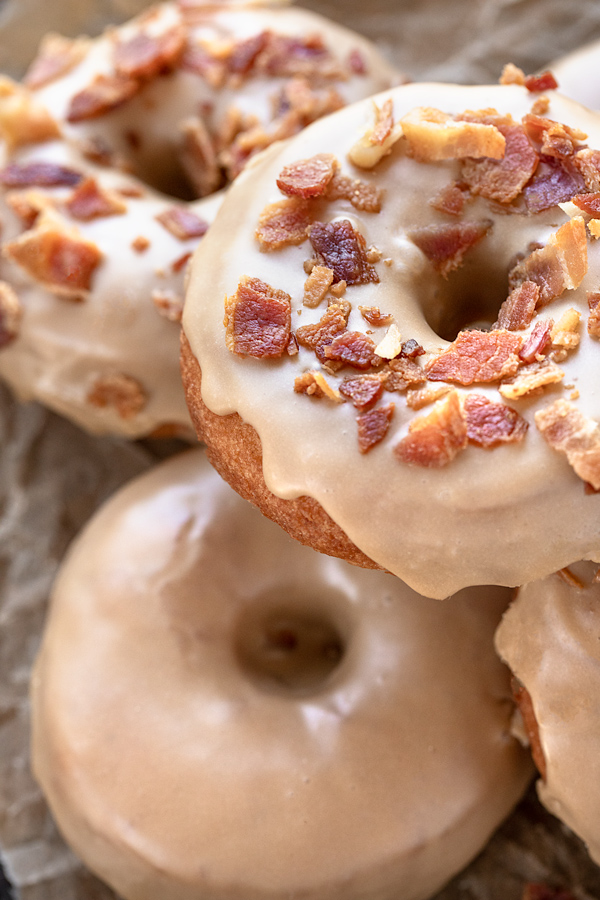
These maple donuts are just like the kind you'd get from a gourmet donut shop or bakery! Wonderfully moist and cakey, and kissed with a hint of nutmeg for that classic flavor, these delicious homemade donuts come with the option to be jazzed up with the addition of crispy bacon if you're feeling adventurous, or left “naked” with only their sweet maple glaze!
Maple Donuts That Rival the Donut Shop's
Have I ever told you that one of my favorite activities during the fall season is preparing desserts and sweet treats? I have? Yeah, I'm pretty certain I've mentioned it here once or twice…at least! 😉
All silliness aside, it's true. I really do enjoy getting out my cozy little apron (I do actually have one!), tying it around my waist, and then getting out all of my sweet and fragrant ingredients to whip up some comforting dessert bliss by way of some muffins, bars, breads, cakes...or donuts!
For me, donuts are a little indulgence, and a slightly guilty pleasure.
I don't eat them all that often, truth be told, but every now and then my hubby and I get a strong craving and prefer to go to a slightly more upscale/gourmet donut shop or bakery for a few sweet “fried rings” to quell our craving.
And while of course I thoroughly enjoy those tasty donuts, I must tell you that nothing beats homemade donuts made from scratch.
When whipped up in one's own kitchen, with simple, flavorful ingredients one can actually pronounce, and most likely has at home in their pantry, there's no sweet treat quite like ‘em.
Lately, I've been tinkering in my kitchen (aka my “lab”), having lots of fun developing my recipe for maple donuts, which sounded particularly enticing to me this season.
We have a few gourmet donut shops here in Los Angeles that make some truly uniquely flavored donuts, and I took my queue from them and decided to have it be an option to even add a sprinkle of crispy bacon to this recipe just for fun.
However, these maple donuts are delicious just as they are, no bacon necessary, if you're not a fan of this savory twist! 😉
Prepared with a moist batter specific to cake donuts, with a whisper of nutmeg and cinnamon to create that classic flavor, then quickly fried and dipped in that creamy maple glaze, these are a total treat and wonderful indulgence.
So if you've ever wanted to try your own hand at homemade donuts, then this maple donut recipe is truly something to give a whirl in order to experience your own better-than-a-gourmet-donut-shop donuts!
How to Make Homemade Donuts Moist and Cakey
There are two types of donuts: raised donuts, which use yeast as a leavening agent; and cake donuts, which do not.
This recipe for homemade cake donuts is leavened using baking powder, which causes the prepared dough to puff in the hot oil when fried, creating steam and cooking the donut from within.
When preparing a cake donut, other ingredients used are flour, spices and/or flavorings, some salt, some sugar, eggs, fats, and a liquid.
In testing this donut recipe, I went through many iterations (!!!) in order to create this one, which had the best cakey texture and flavor, and moist crumb.
A typical fried donut recipe usually calls for milk, but in testing these, I found that adding in a bit more additional fat helped to keep the fried donuts less dense, not dry and heavy (not all that appealing, right?). I wanted these donuts to be lighter, more tender and rich.
For this I turned to half & half instead of milk, and used an extra tablespoon of melted butter in the donut batter as well.
The other key to preparing donuts that are nice and soft, and that taste as close to a donut shop's as possible, is to not overwork the batter/dough itself.
When researching, I noticed that many recipes called for using a stand mixer to mix together the ingredients, but the concern here is that one can very easily over-mix the batter creating tough donuts.
So rather than pulling out the stand mixer, I opted to use a couple of bowls, my hand-held mixer (only briefly), a whisk, and a wooden spoon to do the job.
I won't sugar coat it for you (pun intended), donuts are not necessarily the easiest thing to prepare.
They definitely benefit from some extra patience and lots of love infused into the process, because the dough is quite sticky and soft to work with; but I promise you, it can be done!
And, in my humble opinion, it is so worth the effort.
Here's a glance at how I make my maple donuts: (or just jump to the full recipe...)
- In one bowl, I whisk together all of my dry ingredients.
- Next, in a separate and larger bowl, I add my sugar and eggs; and using my hand-held mixer, I beat until the mixture is thick and pale. Then, I add in my vanilla and my melted butter, and beat those in, just until combined.
- I add about ⅓ of the dry ingredients into my bowl with the eggs/sugar mixture, and using my wooden spoon, mix those together just until combined; I add in half of my half & half and mix, once again, just until combined; I continue to alternate adding in another ⅓ of my dry ingredients, mixing, then adding the rest of my half & half and mixing, finally finishing with the last of the dry ingredients.
- Then, I cover the sticky dough with plastic wrap, and place into the fridge for an hour to rest and chill.
- While my dough chills, I prepare my maple glaze, and crisp/chop some bacon (optional).
- When ready to fry, I slowly heat my oil, very carefully roll my dough (adding a bit of extra flour as needed because it will be sticky), then cut out the donuts/holes, until all the dough is used. (I typically gather up the holes along with the dough scraps and gently re-roll to make more donuts.)
- I fry the donuts in small batches for a total of 2 minutes (1 minute per each side), then drain on a paper towel-lined wire rack and allow to cool.
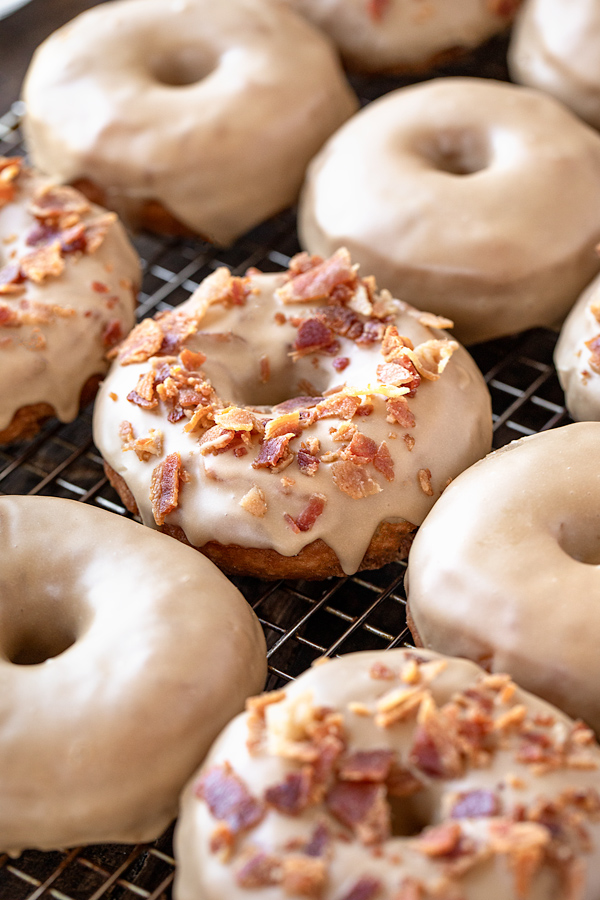
- I dip in the glaze, sprinkle some crispy bacon on a few of the donuts as a tasty topping, allow things to set, and enjoy!
Recipe
Maple Donuts
by Ingrid Beer

Category: Dessert
Cuisine: American
Yield: 15-16 donuts
Nutrition Info: 320 calories
Prep Time: 20 minutes
Cook time: 10 minutes
Total time: 30 minutes
Donut Ingredients:
- 3 cups all purpose flour, plus more for rolling
- 1 tablespoon baking powder
- 1 teaspoon salt
- ½ teaspoon ground nutmeg
- Pinch ground cinnamon (a scant ⅛ teaspoon)
- ¾ cup granulated sugar
- 2 large eggs
- 2 teaspoons pure vanilla extract
- 4 tablespoons (¼ cup) melted, unsalted butter
- ¾ cup half & half
- Neutral oil, for frying (about 6 cups)
- 4 strips bacon (for optional garnish to crisp, chop and sprinkle over glaze)
Maple Glaze Ingredients:
- 2 ¼ cup powdered sugar
- ¼ cup milk or half & half
- ½ teaspoon maple flavor
- ¼ teaspoon pure vanilla extract
- To prepare the donuts, add the flour, baking powder, salt, nutmeg and cinnamon to a medium bowl, and whisk to blend and aerate; set these dry ingredients aside for a moment.
- To another large bowl, add the sugar and the eggs, and using a hand mixer, mix on medium-high until very thick and pale, about 2-3 minutes; add in the vanilla extract and the melted butter, and mix again until incorporated.
- Next, add about ⅓ of the dry ingredients into the sugar/egg mixture, and switching to a wooden spoon now, hand-mix until incorporated.
- Then, pour in half of the half & half, and mix that in until incorporated; repeat the process with another ⅓ of the dry ingredients, then mix; then the rest of the half & half, then mix; then finish with the remainder of the dry ingredients, and gently mix just until everything is incorporated (take care not to over-mix), and the dough is soft and fairly sticky, which you want.
- Place a piece of plastic wrap directly onto the dough in your bowl, and place into the fridge for 1 hour.
- While the dough chills, prepare your maple glaze and crisp your bacon, if using: add all the glaze ingredients into a medium-size bowl, and whisk together until the mixture is smooth, glossy, thick and creamy; cover with plastic and keep at room temp until ready to use.
- Crisp the bacon in a pan for a few minutes, drain, then chop; set aside to use once the donuts have been glazed.
- After an hour, prepare your work space to roll and cut out your dough by sprinkling a little flour over your work surface.
- Add your oil to a large Dutch oven or heavy bottom pot (it should come about 2” up the sides), and begin to slowly heat your oil to 365° (use a thermometer for accuracy).
- While the oil heats, carefully turn out the dough onto your lightly floured work surface (sprinkle a little extra on top of the dough as well) and using a lightly floured rolling pin, gently roll the dough to about ½” thickness.
- Using a 3” cutter for the donuts and a 1” small cutter for the donut holes, cut the donuts out and set them aside on a large baking sheet with flour-sprinkled parchment paper to hold; gather any scraps of dough you have left, gently roll them, and cut those out too, until all dough is cut out. (You can fry the donut holes if you'd like, but I just gather mine up and make another couple of donuts.)
- Once oil is hot, work in batches by adding in about 3 donuts into the oil, and allow them to fry on that first side for about 1 minute, until lightly golden-brown and puffed; then, flip (using tongs) and allow to fry on the other side for 1 minute; remove and allow the donuts to drain on paper towel-lined cooling racks; repeat until all donuts are fried.
- If you're frying the donut holes, fry for about 30 seconds, moving them around to fry all sides, or until golden; allow those to drain, as well.
- Allow the donuts/holes to cool until room temp or only slightly warm before glazing.
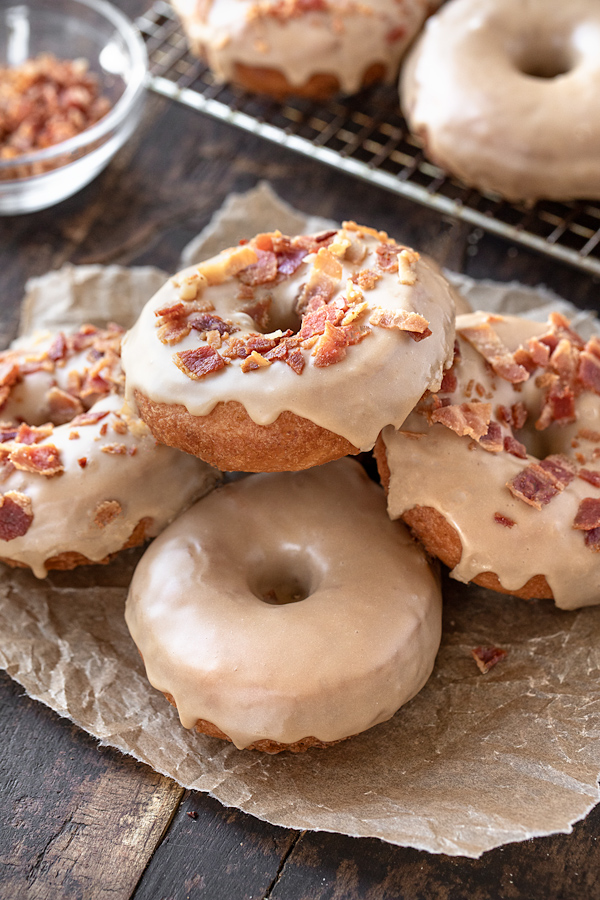
- Dip each donut liberally into the maple glaze, lift, and allow any excess to drip off; set aside on the wire cooling rack to allow the glaze to set up; repeat until all are glazed.
- Sprinkle on the optional crispy, chopped bacon immediately after glazing so that it adheres to the glaze.
Tips & Tidbits for my Maple Donuts recipe:
- All-purpose flour, nice and simple: I tried this recipe using cake flour and thought it was fairly good, but found the all-purpose flour to yield a texture closer to what a donut shop's donut does. So we're keeping it simple with regular ol' all purpose flour!
- Aromatic spices: Ground nutmeg (if you use out of a glass jar, make sure it's fresh) and a little pinch of cinnamon give these cake donuts that unmistakeable donut flavor we know and love—so yummy!
- Higher fat dairy: Half & half is my go-to for these cake donuts, because it has a few extra grams of fat per cup than whole milk, which adds a bit more richness and tenderness to the dough. However, if you don't have the half & half, you can substitute the whole milk, just be aware the donuts may not be quite as rich and moist. (And I wouldn't even recommend using 2% or low fat milk.)
- Flavorful, melted butter: I use 4 tablespoons (¼ cup) melted, unsalted butter in the recipe. It adds good flavor and extra richness!
- Don't over mix: During that stage when you are alternating and mixing in the dry ingredients and the liquid, use a wooden spoon to make sure things are mixed just enough to be well blended, but not over-mixed. I personally feel I have the most control using this method even though it may take a few extra minutes, which is worth it to me.
- Chill the sticky dough: Once mixed, place some plastic wrap directly over the dough and place into the fridge to set/chill for one hour. This does help the dough to be a bit more workable and easy to roll out/cut.
- Use a bit of extra flour when rolling/cutting the dough: I always sprinkle on a fair amount of flour onto my work surface before turning the dough out onto it. I also dip my hands in the flour to help the dough to not stick to them quite as much, and sprinkle some over top before rolling as well. Also, dip the cutters into the flour in between each donut you cut!
- 3” donut cutter and 1” hole cutter: These are the dimensions of the cutters I use for the donuts and their holes. I'm personally not crazy about donut holes, so I actually gather mine up and add them to the dough scraps, then gently re-roll to create more donuts.
- Neutral oil for frying: Since canola oil has gotten a bad wrap, I try to avoid using that at all in my cooking these days. Many oils used for frying are not all that great for us, unfortunately, but since a neutral oil is needed, just use vegetable oil or safflower oil—something that can withstand higher heat when frying.
- Work in small batches for a quick, easier fry: It only takes about 1 minute per side to fry the donuts, and the process is much easier when you only add 3-4 donuts in at a time.
- Drain on paper towels: Draining the donuts on paper towels helps to wick away any extra grease from the donuts once out of the hot oil, so don't skip this step...unless you want greasy donuts! 🙁
- Cool slightly before glazing: While the donuts do not have to be cold to glaze, do allow them some time once out of the oil to cool off to room temp. Then, dip and glaze, and allow it to set for a few minutes before serving the donuts.
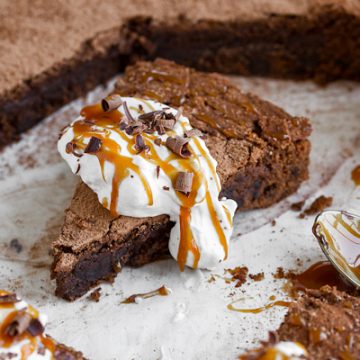
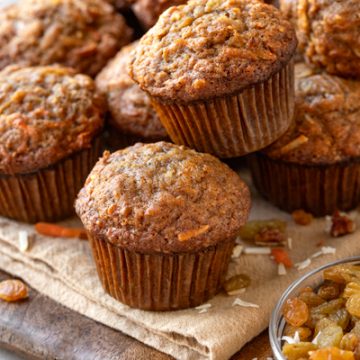
Hungry for more tasty sweet treats? Check out this Apple Cake, these Vanilla Chai Latte Doughnuts, this Brownie Cake, this Chocolate Banana Bread, or this Carrot Cake Loaf!
Janis
These are amazing! I'm glad the process is similar to the Vanilla Chai Tea Latte Donuts, since I've made those more than a few times and it made making these easier. 🙂 They're great without the bacon but the bacon adds another dimension to the taste. 🙂 thank you for the delicious recipe, it's going to be hard not to make them frequently!! 🙂 (I made them with Walmart's Great Value gluten free flour and I was pretty happy with the texture)
The Cozy Apron
Janis, I'm so excited you made these!
Looks like that gluten-free flour is working out for you—glad you have an alternative that allows you to enjoy a dessert like this while still offering a close enough texture.
Hope you get a lot of pleasure out of 'em this season!
Gerald
Can these donuts be baked?
The Cozy Apron
Hi Gerald, I would not recommend that with this particular recipe batter, is it has been developed specifically for frying; but I do have a very tasty recipe on the site specifically for baked donuts if you prefer, and for that you can click here. 🙂
Amy B Radley
We just made these tonight- WOW!!! They came out perfect. The hint of cinnamon was such a nice touch. Thank you!
The Cozy Apron
Hi Amy, so glad these turned out so well for you! Thanks so much for sharing your experience with me and letting me know you're enjoying them. (These donuts happen to be a personal favorite of mine! 😉 )
Joseph Thompson
How is the texture when rolling out? How flour did you add to roll out? I ask cause I've had a hard time in past with doughnut dough lol sorry that's funny to me but anyway so is it always going to be sticky?
The Cozy Apron
Hi Joseph, thanks for your question...the way you wrote that made me chuckle as well! 🙂
Yes, donut dough is NOTORIOUSLY sticky! When I was first playing around with making cake-style donuts, I had a hard time believing it could be rolled out and worked with. But I found out the secret is this: lots of patience, and total "presence of mind" when working with this type of dough...
Sounds corny, but when I truly took my time, and anticipated it being finicky (by my third attempt I knew what I was working with), then I felt like my intension made the dough more willing to be worked with.
I can't tell you how much flour to sprinkle in exactly, but you'll want to add as little as possible, just enough to make it rollable/workable. You'll get tough donuts if you end up adding too much. Also, you'll find that chilling the dough does help. Just take your time with it, be delicate and gentle, know that it'll be sticky (totally normal), and conquer it, lol! 🙂
It's stickiness is what makes that dough tender and delicious once it's fried. You'll do great! Happy donut making, Joseph!
Joseph Thompson
Also what is the oil temperature cause you say "when the oil is hot"what is hot?
The Cozy Apron
In step 9 of the recipe, you'll see that the temperature should be 365°. 😉